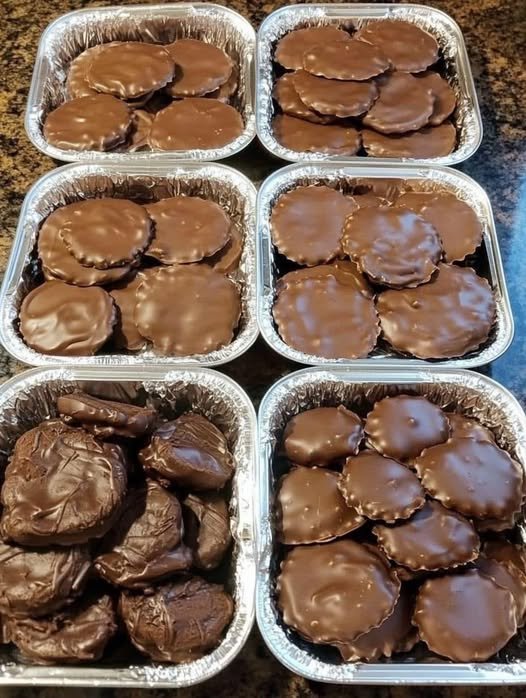
Chocolate-Covered Candies
Chocolate-covered candies are one of those treats that feel special no matter how simple they are. A glossy shell of chocolate wrapped around a sweet, crunchy, chewy, or creamy center is pure joy in every bite. From chocolate-covered peanuts and almonds to caramels, pretzels, or even dried fruit, these candies are easy to make at home and taste just as good—if not better—than store-bought versions. They’re perfect for gifting, holidays, or just keeping a small batch on hand for when a chocolate craving strikes.
Why Make Them at Home?
Making chocolate-covered candies at home gives you complete control over the ingredients and flavors. You can choose high-quality chocolate, adjust sweetness, and mix and match fillings based on what you love. Plus, they don’t require fancy equipment or advanced skills. Once you learn the basic method, you can create endless variations with very little effort.
Ingredients
Base ingredients:
-
300 g good-quality chocolate (dark, milk, or white)
-
2 cups candy centers of your choice
Candy center ideas:
-
Roasted peanuts, almonds, or hazelnuts
-
Soft caramels (cut into bite-size pieces)
-
Pretzels or pretzel twists
-
Dried fruits like raisins, apricots, or cherries
-
Marshmallows
-
Toffee bits or brittle pieces
Optional toppings:
-
Sea salt
-
Crushed nuts
-
Sprinkles
-
Drizzle of contrasting chocolate
Instructions
Start by preparing your work area. Line a baking tray with parchment paper or a silicone baking mat. Make sure your candy centers are dry and at room temperature. Moisture is the enemy of melted chocolate, so this step is important.
Chop the chocolate into small, even pieces and place it in a heatproof bowl. Melt the chocolate gently using a double boiler or the microwave. If using a microwave, heat in 20–30 second intervals, stirring well each time, until the chocolate is smooth and fully melted. Be patient—overheating can cause the chocolate to seize.
Once the chocolate is melted, let it cool slightly so it’s warm but not hot. This helps it coat the candies more evenly.
Add a few pieces of your chosen candy centers into the melted chocolate. Using a fork or dipping tool, gently lift each piece out, tapping the fork against the bowl to remove excess chocolate. Place the coated candies onto the prepared tray, spacing them slightly apart.
If you’re adding toppings like sea salt or crushed nuts, sprinkle them on while the chocolate is still wet. For a decorative touch, you can drizzle melted white or dark chocolate over the top using a spoon or piping bag.
Repeat the process until all the candy centers are coated. If the chocolate starts to thicken, gently rewarm it for a few seconds.
Let the candies set at room temperature until firm. If you’re in a warm climate, you can place the tray in the refrigerator for 10–15 minutes, but avoid leaving it too long, as condensation can form when the candies return to room temperature.
Flavor Variations
One of the best things about chocolate-covered candies is how customizable they are. Dark chocolate pairs beautifully with nuts and dried fruit, balancing sweetness with a slightly bitter edge. Milk chocolate is perfect for caramels and pretzels, creating a classic sweet-and-salty flavor. White chocolate works well with dried berries or crushed cookies for a softer, creamier taste.
You can also flavor the chocolate itself by stirring in a drop of vanilla extract, orange essence, or peppermint flavoring for a festive twist.
Storage and Gifting
Store chocolate-covered candies in an airtight container at room temperature for up to one week, or in the refrigerator for up to two weeks. For gifting, place them in small boxes or jars lined with parchment paper. They make thoughtful homemade gifts for holidays, birthdays, or special occasions.